
Planning a backyard makeover? A gazebo can be a beautiful and functional addition to any outdoor space. Is it possible to build your own gazebo? Absolutely! This comprehensive guide will walk you through every step of DIY gazebo construction, from choosing the right wooden gazebo design and understanding gazebo building plans to selecting gazebo roofing materials and mastering gazebo framing techniques. You’ll learn about gazebo foundation options, get tips on gazebo lumber selection, and even estimate your gazebo construction cost. Let’s dive into building your own backyard gazebo blueprints!
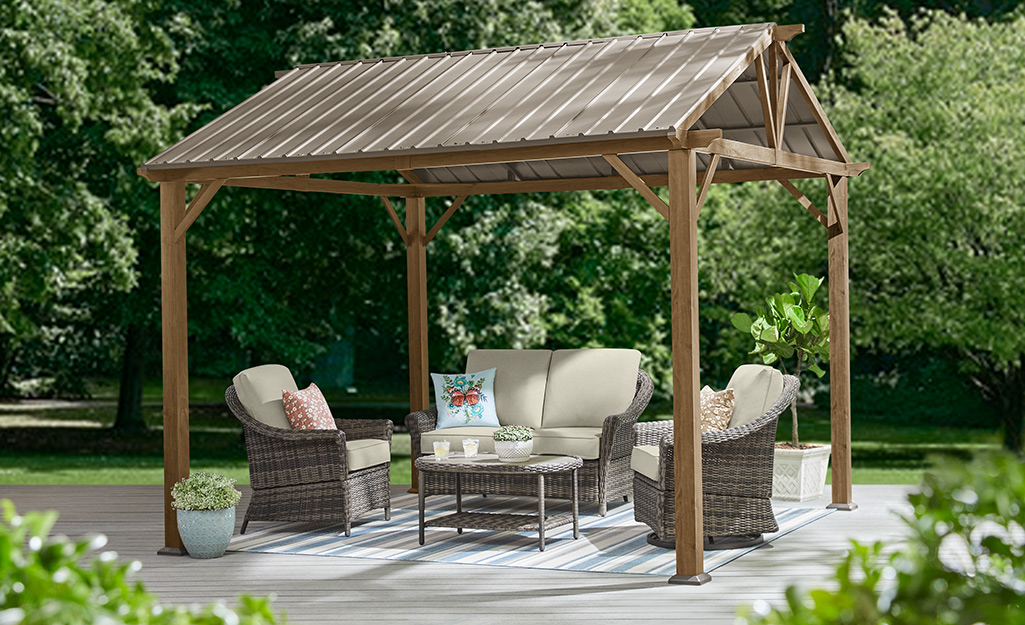
Image Source: contentgrid.homedepot-static.com
Why Build a Gazebo Yourself?
Building your own gazebo offers many benefits:
- Cost Savings: DIY gazebo construction is significantly cheaper than buying a pre-built gazebo or hiring a contractor.
- Customization: You can tailor the design, size, and materials to perfectly match your backyard and personal preferences.
- Skill Development: Building a gazebo is a rewarding project that can improve your carpentry and construction skills.
- Personal Satisfaction: There’s nothing quite like enjoying your outdoor space in a structure you built yourself.
Planning Your Gazebo: Design and Blueprints
Before you start hammering, careful planning is essential. This involves choosing a design, creating or finding gazebo building plans, and considering the size and location of your gazebo.
Selecting a Wooden Gazebo Design
Several gazebo designs can complement your backyard. Here are some popular options:
- Traditional Octagon: This classic design features eight sides and a peaked roof. It’s a timeless choice that fits well in most gardens.
- Round Gazebo: A circular gazebo offers a more open and inviting feel. It’s ideal for social gatherings and creating a focal point in your backyard.
- Square Gazebo: A square gazebo provides a modern and minimalist aesthetic. It’s a great option for smaller spaces or contemporary landscapes.
- Rectangular Gazebo: Ideal for longer, narrower yards, providing a defined outdoor living space.
- Victorian Gazebo: Characterized by ornate details, intricate woodwork, and a charming, romantic feel.
Consider your budget, skill level, and the overall style of your home and garden when choosing a design.
Locating Gazebo Building Plans
Where can you find gazebo building plans? You have several options:
- Online Resources: Many websites offer free or paid gazebo blueprints. Search for “free gazebo plans” or “backyard gazebo blueprints” to find a variety of options.
- Home Improvement Stores: Some stores offer gazebo plans with the purchase of lumber and other materials.
- DIY Books and Magazines: Check your local library or bookstore for books and magazines that feature gazebo building projects.
- Draft Your Own: If you have some design experience, you can create your own custom gazebo plans. This gives you complete control over the design and dimensions.
When selecting plans, make sure they are clear, detailed, and appropriate for your skill level. Look for plans that include:
- Dimensions and measurements
- Material list
- Step-by-step instructions
- Diagrams and illustrations
Deciding on Size and Location
The size of your gazebo should be proportional to your backyard. Consider how you plan to use the gazebo and how many people you want to accommodate. Also, consider the local zoning laws regarding structures and their sizes.
- Small Gazebo (8-10 feet diameter): Suitable for small gatherings or creating a cozy reading nook.
- Medium Gazebo (12-16 feet diameter): Ideal for larger gatherings and outdoor dining.
- Large Gazebo (18+ feet diameter): Perfect for entertaining large groups or creating a luxurious outdoor living space.
Choose a location that is level, well-drained, and accessible. Consider the following factors:
- Sun Exposure: Do you want a sunny or shady spot?
- Privacy: Do you want the gazebo to be secluded or open to the rest of the yard?
- Proximity to House: How close do you want the gazebo to be to your home?
- Utilities: Do you need access to electricity or water?
Laying the Groundwork: Gazebo Foundation Options
A solid foundation is crucial for a stable and long-lasting gazebo. Here are several gazebo foundation options to consider:
- Concrete Slab: A concrete slab provides the most stable and durable foundation. It’s ideal for larger gazebos or areas with unstable soil.
- Pros: Very strong, long-lasting, provides a level surface.
- Cons: Most expensive, requires more effort to install.
- Gravel Base: A gravel base is a more affordable and easier-to-install option. It’s suitable for smaller gazebos in areas with good drainage.
- Pros: Affordable, easy to install, provides good drainage.
- Cons: Less stable than concrete, may require periodic maintenance.
- Decking Foundation: Use deck blocks and a ledger board system to create the foundation.
- Pier Blocks: Concrete blocks set on compacted gravel. Each block supports a post.
- Pros: Affordable, relatively easy to install.
- Cons: Can shift over time, less stable than a full slab.
Before you start, check your local building codes to see if a permit is required for your foundation.
Building a Gravel Base Foundation
- Excavate: Dig out the area for the gazebo foundation to a depth of about 6-8 inches.
- Level and Compact: Level the soil and compact it with a hand tamper or plate compactor.
- Add Gravel: Add a layer of gravel, about 4-6 inches thick.
- Compact Again: Compact the gravel layer thoroughly.
- Level: Level the gravel surface with a rake or shovel.
Creating a Concrete Slab Foundation
- Excavate: Dig out the area for the gazebo foundation to a depth of about 6 inches.
- Build a Form: Construct a wooden form around the perimeter of the excavation.
- Add Gravel: Add a layer of gravel, about 4 inches thick.
- Compact: Compact the gravel layer thoroughly.
- Reinforcement: Install wire mesh or rebar to reinforce the concrete.
- Pour Concrete: Pour concrete into the form and level it with a screed board.
- Finish: Smooth the surface with a trowel and let it cure for at least 7 days.
Constructing the Frame: Gazebo Framing Techniques
The gazebo frame provides the structural support for the roof and walls. This section will cover gazebo lumber selection and gazebo framing techniques.
Choosing Gazebo Lumber
Select high-quality lumber that is durable and weather-resistant. Pressure-treated lumber is an excellent choice for the frame because it is resistant to rot and insect damage. Cedar and redwood are also good options for their natural resistance to the elements.
Here’s a lumber selection guide:
| Lumber Type | Pros | Cons | Best Use |
|---|---|---|---|
| Pressure-Treated | Resistant to rot and insects, affordable | Can contain chemicals, may require special handling | Framing, posts, and any parts in contact with the ground |
| Cedar | Naturally weather-resistant, beautiful appearance, aromatic | More expensive than pressure-treated lumber | Trim, railings, and other decorative elements |
| Redwood | Naturally weather-resistant, durable, beautiful color | More expensive than cedar, can be difficult to find in some areas | Framing, trim, and other visible parts |
| Douglas Fir | Strong, affordable, readily available | Not as weather-resistant as cedar or redwood, needs to be treated | Framing (if properly sealed and protected) |
Assembling the Frame
- Posts: Cut the posts to the desired length and attach them to the foundation using appropriate hardware. Ensure the posts are plumb and level.
- Beams: Attach the beams to the posts, creating the main support structure for the roof. Use strong fasteners and ensure the beams are level.
- Rafters: Cut the rafters to the correct angle and attach them to the beams. The rafters will support the roofing material. Use a rafter square to ensure accurate cuts.
- Bracing: Add diagonal bracing between the posts and beams to provide additional stability.
- Flooring (Optional): If you want a raised floor, install joists between the posts and cover them with decking boards.
Topping It Off: Gazebo Roofing Materials
The roof protects the gazebo from the elements and adds to its overall aesthetic appeal. There are many gazebo roofing materials to choose from.
Different Roofing Material Options
- Asphalt Shingles: Affordable, easy to install, and available in a variety of colors.
- Pros: Inexpensive, readily available, easy to install.
- Cons: Not as durable as other options, can detract from the aesthetic.
- Wood Shingles or Shakes: Offer a natural and rustic look.
- Pros: Attractive, natural look, durable.
- Cons: More expensive than asphalt shingles, requires more maintenance.
- Metal Roofing: Durable, long-lasting, and available in various styles and colors.
- Pros: Very durable, long-lasting, low maintenance.
- Cons: More expensive than asphalt shingles, can be noisy during rain.
- Cedar Shingles: Durable and weather-resistant, a great choice for a traditional look.
- Tile Roofing: Provides a classic and elegant look.
- Thatch Roofing: Provides a tropical look, but has a shorter lifespan.
Installing the Roof
- Sheathing: Cover the rafters with plywood or OSB sheathing. This provides a solid base for the roofing material.
- Underlayment: Install a layer of roofing felt or synthetic underlayment over the sheathing to protect it from moisture.
- Roofing Material: Install the roofing material according to the manufacturer’s instructions. Start at the bottom and work your way up, overlapping each course.
- Flashing: Install flashing around the chimney, vents, and other roof penetrations to prevent leaks.
- Ridge Cap: Install a ridge cap along the peak of the roof to protect the exposed edges.
Final Touches: Gazebo Assembly Guide
Once the frame and roof are complete, you can add finishing touches to customize your gazebo.
Adding Walls, Railings, and Screens
- Walls: Add partial or full walls for added privacy and protection from the elements.
- Railings: Install railings around the perimeter of the gazebo for safety and aesthetic appeal.
- Screens: Add screens to keep out insects and provide ventilation.
- Doors: Add a gate or door for privacy and controlled access.
Painting, Staining, and Sealing
- Painting: Protect the wood and enhance its appearance with a coat of paint. Choose an exterior-grade paint that is resistant to fading and cracking.
- Staining: Enhance the natural beauty of the wood with a stain. Choose a stain that is appropriate for the type of wood you are using.
- Sealing: Protect the wood from moisture and UV damage with a sealant. Apply a sealant after painting or staining.
Decorating and Furnishing
- Lighting: Install lights to illuminate the gazebo at night. String lights, lanterns, or spotlights can create a warm and inviting atmosphere.
- Furniture: Add comfortable seating, tables, and other furniture to create a relaxing and functional outdoor space.
- Landscaping: Surround the gazebo with plants, flowers, and shrubs to integrate it into the surrounding landscape.
- Accessories: Add decorative accessories such as rugs, pillows, and artwork to personalize the space.
Figuring Costs: Gazebo Construction Cost
Estimating the gazebo construction cost is essential for staying within budget. Here’s a breakdown of the typical expenses:
| Item | Cost (Approximate) | Notes |
|---|---|---|
| Lumber | \$500 – \$1500 | Depends on the type and quantity of wood. |
| Roofing Materials | \$200 – \$800 | Varies based on the type of material (asphalt, wood, metal). |
| Foundation Materials | \$100 – \$500 | Cost of gravel, concrete, or pier blocks. |
| Hardware (nails, screws) | \$50 – \$100 | |
| Paint/Stain/Sealer | \$50 – \$200 | |
| Tools (if needed) | \$100 – \$500 | If you need to purchase or rent tools. |
| Permits | \$50 – \$200 | Check local building codes for permit requirements. |
| Total | \$1050 – \$3800 | This is a rough estimate. Prices can vary significantly. |
Tips for Saving Money:
- Shop Around: Compare prices at different lumber yards and home improvement stores.
- Use Salvaged Materials: Consider using reclaimed lumber or other salvaged materials.
- Build in Stages: Spread the project out over time to reduce the initial cost.
- Do It Yourself: Avoid hiring contractors by doing as much of the work as possible yourself.
FAQ: Building Your Own Gazebo
- What is the best wood to use for a gazebo? Pressure-treated lumber is excellent for framing due to its rot resistance. Cedar and redwood are great choices for visible parts due to their natural weather resistance and beauty.
- Can I build a gazebo without a permit? Check your local building codes to determine if a permit is required. Requirements vary by location and size of the structure.
- Who is best suited to build their own gazebo? Individuals with basic carpentry skills, attention to detail, and the ability to follow plans can successfully build their own gazebo.
- How long does it take to build a gazebo? The time it takes to build a gazebo depends on the size and complexity of the design, as well as your skill level. A simple gazebo can be built in a weekend, while a more elaborate structure may take several weeks.
Embarking on the journey of constructing your very own gazebo is a deeply satisfying endeavor, one that promises to transform your backyard into a captivating retreat while simultaneously boosting your property’s appeal and worth. Through meticulous foresight, the selection of quality components, and a dedicated effort, you’ll sculpt a stunning, purposeful structure that will be a source of delight for countless seasons. Here’s to your triumphant DIY gazebo build!

William has over three years of experience in building gazebos. He started AskGazebo.com to assist his clients.