Want to put a roof on your gazebo? Yes, you can build a roof on a gazebo yourself. This guide will walk you through every step, from planning to the final shingle, so you can create a beautiful and functional outdoor space.
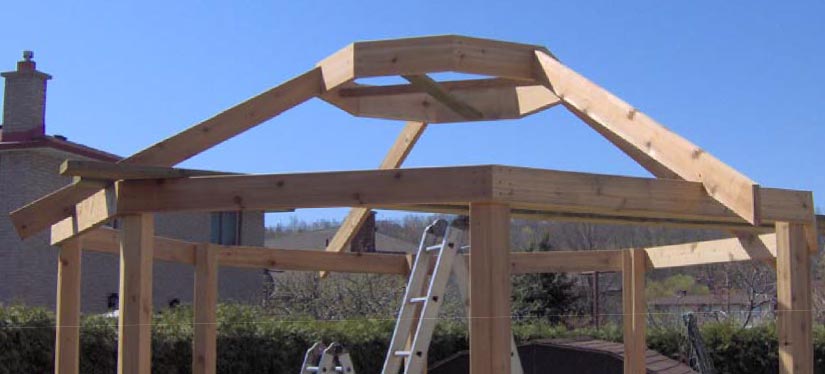
Image Source: diydeckplans.com
Planning Your Gazebo Roof Construction
Before you start hammering and sawing, careful planning is key to a successful gazebo roof construction project. This stage sets the foundation for a sturdy and visually appealing roof.
Choosing a Gazebo Roof Design
The roof design is the most important thing to decide on. It affects how your gazebo looks and how easy it is to build. Here are some popular gazebo roof designs:
- Gable Roof: A simple “A” shape. Easy to build and sheds water well.
- Hip Roof: Slopes on all four sides. More complex than a gable roof, but offers better wind resistance.
- Pyramid Roof: All sides slope to a single point. A classic look, but requires precise cuts.
- Dome Roof: A curved shape. The most challenging to build, but very attractive.
- Bell-Shaped Roof: Similar to a dome roof but with a more pronounced curve at the bottom edge. This design adds a touch of elegance and can enhance water runoff.
Table 1: Comparing Gazebo Roof Designs
| Roof Design | Complexity | Water Shedding | Wind Resistance | Visual Appeal |
|---|---|---|---|---|
| Gable | Easy | Excellent | Good | Simple |
| Hip | Medium | Excellent | Excellent | Elegant |
| Pyramid | Medium | Good | Good | Classic |
| Dome | Hard | Good | Fair | Stunning |
| Bell-Shaped | Hard | Excellent | Fair | Very Elegant |
Selecting Gazebo Roof Materials
The materials you choose affect the roof’s look, how long it lasts, and how much it costs. Here are some common gazebo roof materials:
- Wood Shingles/Shakes: A classic and natural look. Can be expensive and require regular maintenance.
- Asphalt Shingles: Affordable and easy to install. Available in many colors and styles.
- Metal Roofing: Durable and long-lasting. Can be noisy during rain.
- Cedar Shingles: Naturally resistant to rot and insects. A beautiful and long-lasting option.
- Thatch: Provides a tropical look and is eco-friendly. Requires specialized installation and regular maintenance.
- Synthetic Thatch: Mimics the look of natural thatch but is more durable and requires less maintenance.
- Canvas: A good option to build a gazebo canopy. It is durable, relatively inexpensive, and offers excellent shade.
Table 2: Gazebo Roof Materials Comparison
| Material | Cost | Durability | Maintenance | Appearance |
|---|---|---|---|---|
| Wood Shingles | High | Medium | High | Natural |
| Asphalt Shingles | Low | Medium | Low | Versatile |
| Metal Roofing | Medium | High | Low | Modern |
| Cedar Shingles | High | High | Medium | Elegant |
| Thatch | Medium | Medium | High | Tropical |
| Synthetic Thatch | Medium | High | Low | Tropical |
| Canvas | Low | Medium | Low | Simple |
Creating Gazebo Roofing Plans
Detailed plans are vital for avoiding mistakes and ensuring a smooth building process. Your plans should include:
- Measurements: Exact measurements of the gazebo’s frame.
- Rafter Layout: How the rafters will be placed and connected.
- Cutting List: A list of all the lumber you need to cut, with dimensions.
- Material List: A complete list of all materials needed, including fasteners.
- Step-by-Step Instructions: Clear instructions for each stage of the construction.
There are several ways to get gazebo roofing plans:
- DIY Plans: Create your own plans using online resources and design software.
- Pre-Made Plans: Purchase ready-made plans online or from a home improvement store.
- Professional Architect/Designer: Hire a professional to create custom plans tailored to your specific gazebo.
Estimating Gazebo Roofing Cost
Figuring out the cost beforehand helps you stay within your budget. Here’s what to consider:
- Materials: The cost of lumber, roofing materials, fasteners, and any other supplies.
- Tools: The cost of renting or buying any tools you don’t already have.
- Labor: If you’re hiring any help, factor in their hourly rate or project fee.
- Permits: Check with your local building department to see if you need any permits.
- Contingency: Add 10-15% to your budget to cover unexpected expenses.
Example Cost Breakdown (Pyramid Roof, Asphalt Shingles)
| Item | Estimated Cost |
|---|---|
| Lumber | \$200 – \$400 |
| Asphalt Shingles | \$150 – \$300 |
| Fasteners | \$20 – \$50 |
| Tools (Rental) | \$50 – \$100 |
| Permits | \$0 – \$50 |
| Total | \$420 – \$900 |
Note: Prices may vary depending on location and material quality.
Gazebo Roof Framing: The Backbone of Your Structure
Framing is the most important step in gazebo roof installation. It provides the support for the roofing materials.
Building the Rafters
Rafters are the sloping beams that support the roof. Here’s how to build them:
- Measure and Cut: Use your plans to measure and cut the rafters to the correct length and angle. A miter saw is very helpful for accurate cuts.
- Assemble Rafters: Connect the rafters at the peak using nails, screws, or metal connectors.
- Test Fit: Place the rafter assembly on the gazebo frame to ensure it fits properly. Make any necessary adjustments.
Installing the Rafter Frame
- Attach to Posts: Secure the rafter frame to the gazebo posts using screws or bolts. Make sure the frame is level and plumb.
- Add Support Beams: Install horizontal support beams between the rafters for added strength.
- Check for Stability: Ensure the entire frame is stable and can support the weight of the roofing materials.
Building a Gazebo Canopy
A gazebo canopy is an excellent alternative to a full-fledged roof, offering shade and protection from light rain without the complexity of a full roofing structure. To build a gazebo canopy, consider these steps:
- Frame Construction: Build a lightweight frame from wood or metal to support the canopy fabric.
- Fabric Selection: Choose a durable, weather-resistant fabric such as canvas or outdoor polyester.
- Attachment: Secure the fabric to the frame using grommets, clips, or ties, ensuring it’s taut and evenly distributed.
Gazebo Roof Installation: Step-by-Step Guide
Once the frame is up, it’s time to install the roofing materials.
Installing Sheathing
Sheathing provides a solid surface for attaching the roofing materials.
- Cut Sheathing: Cut plywood or OSB sheathing to fit the rafter frame.
- Attach Sheathing: Nail or screw the sheathing to the rafters, starting at the bottom and working your way up.
- Stagger Seams: Stagger the seams between sheathing panels for added strength.
Applying Underlayment
Underlayment provides a waterproof barrier between the sheathing and the roofing materials.
- Roll Out Underlayment: Roll out roofing felt or synthetic underlayment over the sheathing.
- Overlap Seams: Overlap the seams by at least 6 inches to prevent water penetration.
- Secure Underlayment: Nail or staple the underlayment to the sheathing.
Installing Roofing Materials
The installation process varies depending on the type of roofing material you choose.
Installing Asphalt Shingles
- Start at the Bottom: Begin installing shingles at the bottom edge of the roof, working your way up.
- Overlap Shingles: Overlap each row of shingles according to the manufacturer’s instructions.
- Nail Shingles: Use roofing nails to secure each shingle to the sheathing.
- Install Ridge Cap: Install ridge cap shingles along the peak of the roof to seal the ridge.
Installing Wood Shingles/Shakes
- Start at the Bottom: Begin installing wood shingles/shakes at the bottom edge of the roof, working your way up.
- Overlap Shingles/Shakes: Overlap each row of shingles/shakes according to the manufacturer’s instructions. Typically, this is more overlap than with asphalt shingles.
- Nail Shingles/Shakes: Use corrosion-resistant nails to secure each shingle/shake to the sheathing.
- Stagger Joints: Stagger the joints between shingles/shakes in each row for a more natural look and improved weather resistance.
Installing Metal Roofing
- Prepare the Surface: Ensure the sheathing is clean and dry. You may need to install a layer of underlayment designed specifically for metal roofing.
- Install Panels: Install metal panels according to the manufacturer’s instructions. This often involves overlapping the panels and using special screws or fasteners.
- Seal Seams: Seal the seams between panels to prevent water leakage.
- Install Trim: Install trim along the edges and ridges of the roof to provide a finished look and added protection.
Expert Tips for Gazebo Roof DIY
- Get Help: Roofing can be dangerous. Enlist the help of a friend or family member.
- Use the Right Tools: Using the right tools makes the job easier and safer.
- Follow Instructions: Always follow the manufacturer’s instructions for the roofing materials.
- Take Your Time: Don’t rush the process. Take your time and do it right.
- Safety First: Wear safety glasses, gloves, and a hard hat.
Troubleshooting Common Problems
- Leaks: If you experience leaks, check the flashing around the chimney, vents, and other roof penetrations.
- Sagging: If the roof is sagging, it may be due to undersized rafters or inadequate support.
- Missing Shingles: Replace any missing shingles as soon as possible to prevent water damage.
Maintaining Your Gazebo Roof
Regular maintenance extends the life of your gazebo roof.
- Inspect Regularly: Inspect the roof at least twice a year for damage.
- Clean Debris: Remove leaves, branches, and other debris from the roof.
- Trim Trees: Trim any trees that overhang the gazebo to prevent damage from falling branches.
- Repair Damage: Repair any damage as soon as possible to prevent further problems.
Frequently Asked Questions (FAQ)
What is the best material for a gazebo roof?
The best material depends on your budget, aesthetic preferences, and climate. Asphalt shingles are affordable and versatile, while wood shingles offer a natural look and cedar provides excellent durability. Metal roofing is a long-lasting option, and thatch creates a tropical vibe.
Can I build a gazebo roof myself?
Yes, you can build a gazebo roof yourself with careful planning, the right tools, and a willingness to learn. This guide provides step-by-step instructions to help you through the process.
Who is responsible for gazebo roof repairs?
As the homeowner, you are responsible for gazebo roof repairs unless it’s covered by a warranty or insurance policy.
How much does it cost to roof a gazebo?
The cost to roof a gazebo varies depending on the size of the gazebo, the materials used, and whether you hire a professional. A small gazebo with asphalt shingles might cost \$400-\$900, while a larger gazebo with cedar shingles could cost several thousand dollars.
What tools do I need to build a gazebo roof?
Essential tools include:
- Circular saw
- Miter saw
- Hammer or nail gun
- Tape measure
- Level
- Utility knife
- Safety glasses
- Gloves
- Roofing nailer (for asphalt shingles)
How long does it take to build a gazebo roof?
The time it takes to build a gazebo roof depends on your experience level, the complexity of the design, and the size of the gazebo. A simple roof can be completed in a weekend, while a more complex roof may take several days.
Do I need a permit to build a gazebo roof?
Check with your local building department to determine if you need a permit. Requirements vary depending on your location and the size of the gazebo.
Crafting a gazebo roof is a deeply satisfying endeavor, one that transforms your outdoor sanctuary with both beauty and lasting resilience. With this guidance, you’ll soon be basking under a roof built to withstand the elements and deliver years of delightful shade.

William has over three years of experience in building gazebos. He started AskGazebo.com to assist his clients.